Corset Making Supplies

Corset Making Supplies
A corset can be worn in any way you imagine

Monday, September 30, 2013

Corset Making Class


Corset Making Class in December 2013


Taught by Linda Sparks

Author of “The Basics of Corset Building” 

Two day workshop will see you make a mock-up from a commercial pattern, fit it to your body, make alterations to the pattern for future use and make the mock-up into a real corset with bones and busk etc. All supplies are included in the class fee and machines are supplied. You must at least have basic sewing skills – be familiar with operating a sewing machine and bring your own tools (see through ruler, scissors for paper and fabric, pins, measuring tape, note taking materials, tracing wheel and paper, tape etc.)
 
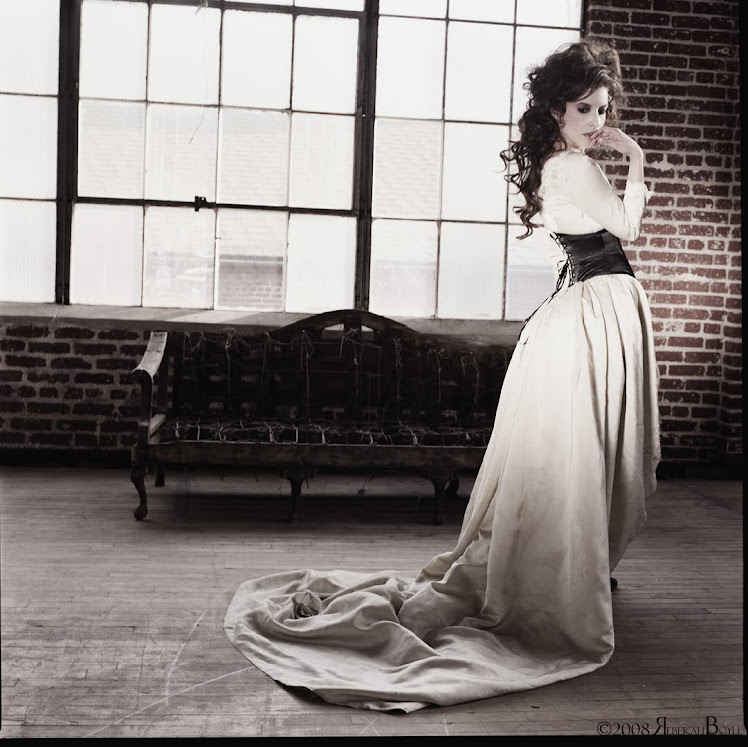
The corset to the right is NOT the corset we will make in class...but it's something to aspire to!
 
Depending on your abilities you may not finish the corset in class time but you will know how to finish it. Depending on your abilities you may not have a corset you want to wear by the end of class but you'll have the skills to make a better one. Come and learn how to make your own corset!

When: December 7th & 8th   

Time: 9:30 – 4:30

Where: Montreal  at  École de couture Céline Ross

 4230 Décarie Blvd. Montreal, QC H4A 3K3


Fee: $270.00 plus tax for a total of $305.00


To register e-mail Linda@farthingalesla.com with your phone number and she will call you to register you and get credit card payment. You can also opt to pay via PayPal.

Monday, September 23, 2013

Wire Mask or Head Piece


I've been experimenting with some products we have; it's a great escape from paperwork sometimes! We sell "millinery wire" a.k.a. "hat wire" in 3 different gauges but I must admit I've always found it a challenge to work with. I seem to have heavy hands and can never get a nice look as my wire ends up all wobbly. So I decided to try one of our more stable products: German Plastic Boning in the 5mm width (product number 50-8125-05). It's a narrow flat boning that can be sew to it's self or to anything else that can be sewn and it can be shaped a bit with heat from a warm iron. German Plastic boning is white to start and since I wanted black I threaded the 5mm German Plastic boning into a length of our black nylon braided lacing (the white is dyeable so I could to this in any colour) Product # 03-7176N-90. I took 2 meters of the boing and 2.5 meters of the lacing because I wanted to be able to cut lengths and close the lacing over the ends of each bone. The lacing melts with the heat of a "lighter" so I was able to seal each section of lacing over the bone which meant that the bone could not slide out and melting the ends was a lot faster than sewing would have been.
I did use a Styrofoam head to help me and I just played with the boning to create a simple shape but there seems to be limitless possibilities. The German Plastic boning does not kink like my wire did, so I found it easy to work with and the ability to pin through it into the Styrofoam head made working with it easy. I pinned all the joined sections first and then hand stitched the join. I hand stitched through the nylon braided lacing that covered the plastic boning as it was easier than sewing through the bone and it still created a secure join.


 After the shape was completed I wrapped some fine net; a soufle type net, over the section that would be in front of the eyes. Hand stitching it to the nylon braid lacing. The net is very sheer but very strong and is product number 24-5510-90 (the white version of this net is dyeable).

This head piece does not fit the Styrofoam head well but it did fit the human head that it was created for.

This was my first attempt at this type of thing and while I would do a few things differently (like not have one of the connections under the chin as it's too obvious), I'm generally happy with how easy the product were to work with and how little time it took...once I figured out what I wanted where it was only about an hour to put it together.


I've included a close-up so you can see the mesh detail

Product can be found at www.farthingalescorsetmakingsupplies.com where they sell more than just corset making supplies.

German Plastic Boning specifically can be found at: http://farthingalescorsetmakingsupplies.com/products.php?cat=plastic+bones
 
Nylon Braided Lacing specifically can be found at: http://farthingalescorsetmakingsupplies.com/products.php?cat=lacing
 
and the Fine Soufle Type Net can be found at: http://farthingalescorsetmakingsupplies.com/products.php?cat=net

Monday, September 9, 2013

Waist Cincher Corset is finished

The fabric used for this waist cincher corset is "spot broche" coutil also known as "dot coutil". It's the most durable of all coutil and I've opted to use it without any fashion fabric as it's very pretty as it is.  The bone casings are on the inside of the corset and I've bound the seam allowances to create some of them. Doing so meant there was no need for a lining. So this corset is made from just one layer of seriously strong fabric - dot coutil. Note the little pocket I added - it may seem too tiny to be of much use but it's all I need to carry a folded up bill or change.

I used decorative stitching to indicate some corset bone placements.  I edge stitched the seams in a contrast colour; more for a design detail than any necessity and I used a decorative stitch to secure the top binding of Petersham ribbon. The bottom edge was bound in the same Spot coutil the corset was made from. 
 

Instead of grommets I used black D-rings set w black rivets down the center back and lace the corset with nylon flat braid black lacing. The back includes a modesty panel made from the spot coutil.

All materials used can be found on the

Farthingales Corset Making Supplies web site

www.farthingalescorsetmakingsupplies.com

Saturday, August 24, 2013

Corset Project - Black corset w grey dots.

Two new coutil fabrics came in a few weeks ago and I've got an event coming up in October (the Creativ Festival) that I'd like a new corset for.  I had settled on a black and grey herringbone suiting that I could make into a waist cincher using the new black coutil with grey dots (spot broche coutil) as the the foundation.  When it came time to cut the fabrics out I decided I didn't want to hide the coutil! So I'm making a long-line under-bust corset using the black coutil with grey dots and I'll wear it with a black skirt and black blouse.

Here is where I've got to so far.

The busk looks silver but it's actually black metallic and I created a placket behind it to protect my skin or at lease keep my blouse from getting caught between the two fronts.


I like to have a pocket on my corsets so I have some place to put my lunch money and don't have to carry a purse so I added one and incorporated it into decorative stitching.  You can see it in the curved row of stitches. 
 
 
I rarely line my corsets though I did think about doing it on this one but most corsets I make end up getting looked at by students so it makes more sense to keep the inside lining free and all the details visible. A well made corset is just as neat inside as out so a lining is really not needed. I opted to use contrasting thread to sew the bones casings on but I did not use the contrasting thread on the outside of the corset as it seemed like it would make it too busy since there was already decorative stitching.


I'm busy working on another project so this is what I'm doing when I need a break. I'll post more as I get it done.


All products are from www.farthingalescorsetmakingsupplies.com

This particular coutil known as "spot broche", "dot coutil" and "spot coutil" is available in several colour combinations and is the ultimate in durability. It's used by theatres all over the world because it's easy to work with and corsets made from it last!


Sunday, August 18, 2013

Dyeing Coutil and Corset Laces

Just to experiment I tried dying some coutil and the two new Farthingales corset laces and here is the result.

I used Dylon Violet dye and worked in a pot on my stove stop as I was just dyeing sample lengths. The instructions that came with the dye were very easy to follow.

I put all the pieces into the pot at the same and they all stayed in the pot for a full 20 minutes.


Item number 88-71WC-01 is white cotton corset lacing with a waxed finish. I assumed this product would not dye evenly because the of the finish but in fact it took the dye fastest and deepest; the finish must have completely dissolved. Unfortunately once the finish was gone the lace increased in width; it started at 1/4" wide and ended up at 3/8" wide. But the colour is intense.


Item number 01-7671N-01 is white nylon braid corset lacing. It did not take the dye as quickly but it did take the colour equally intensely and the dyeing did not noticeably alter the size or feel of the corset lacing. The nylon corset lacing had a beautiful sheen before it was dyed and after.    


Coutil is only available in a limited number of colours and patterns but it's all either 100% cotton or a cotton viscose blend so I expected some success with dyeing. Some coutil has a finish applied to it that may effect how evenly the coutil takes dye but  none of the pieces I tested were a problem. The one I was most interested in experimenting with was the new rose brocade coutil that is black with "champaign" roses item #74-1148-92. I was hoping that the roses would turn deep purple and they might have if I left the sample in the dye-pot longer. While I didn't get the deep purple I had hoped for, I was not disappointed with the result...the pale lavender roses on a black background is quite stunning and I actually like it better than if they had gone deep purple. The photo does not do the fabric justice!


I also added satin coutil and a satin brocade coutil to the mix and got fantastic results for both. The plain satin; item 74-1150-01 and the satin/brocade known as bzy floral coutil #74-1158-01 took the dye well and ended up a perfect match with each other and the with the nylon lacing!

While I can't image when I'm going to get a chance to dye more fabric and make a new corset I am definitely inspired to find time soon.

The last piece I tested was a cotton viscose brocade coutil 74-1130-20 "diamond brocade". It started out beige but ended up the same shade of deep purple as the satin, however it got rolled up in the pot and only the edges were exposed to enough dye to colour it so I'm not sure about it's success. I suspect it would dye well provided it was all equally exposed.


You can find more information on the over 20 coutil patterns and colours that are available by going to:


https://www.farthingalescorsetmakingsupplies.com/Coutil-Corset-fabric-s/1818.htm


Wednesday, August 7, 2013

Bustles, Hoopskirts and Cages

What was under the dress?                                                              We see paintings and drawings of fashions in the past but we don't often see what was underneath the clothes helping to create the shapes which make for period defining silhouettes.                    Farthingales will be offering a free "trunk show" of structural under garments (bustles, hoop skirts, cage crinolines, panniers and farthingales) to demonstrate how dresses of the past got their shape. This "trunk show" will be held on Friday, October 25th  and Saturday, October 26th during the Creativ Festival in Toronto, Ontario.  Both events will be held at 1 p.m.                                          If  historic costumes are not really of interest then think outside the box...how could you apply these techniques to contemporary fashion? Learn about the materials and techniques used to make shapes.  Access to the demo is free with admission to the Creativ Festival where you'll find tons of stuff to see and an opportunity to purchase supplies.                                                                        


Go to www.creativfestival.ca and use Discount Code CFSAVE2 

and SAVE $2.00 on your adult or senior ticket


Monday, July 29, 2013

Corset Busks; regular, wide, spoon and colours

Corset busks that open have been around since the mid 1800's. Made of metal an opening corset busk consists of two parts; one side has knobs and the other loops. When the loops are hooked over the knobs the busk acts like a clasp to hold a corset shut. This means that you can get into a corset without someone to dress you. Always loosen the corset laces before attempting to get into and out of the corset. Since a corset is essentially smaller that your body, trying to put the corset on without loosening the corset laces will be impossible and trying to take the corset off without loosening the ties will potentially damage the busk.
 
You have choices when buying a busk.  The most common busk is a "regular busk" or "straight busk" which is white with silver coloured knobs and loops. More colour options have become available in the last few years so you can now get "gold busks" that have gold knobs and loops,  "antique brass busks", "black busks" and even ones that have "diamonds"/clear crystals set in the knobs that are called "diamond busks" (though no, they are not real diamonds). Having colour options means you can co-ordinate the busk to the fashion fabric.
 
There are also "wide busks" and "spoon busks" both of which are silver in colour and made from stainless steel. The "wide busks" are extremely supportive and a good choice for women or men needing/wanting more support - they don't flex nearly as well as a regular busk so they don't curve over the chest well.  The "Spoon busk" is historically accurate for corsets of the late 1800's and the bowl of the spoon is meant to cup the stomach...not the chest!
 
The busk (regardless of style or colour) should be put into the corset with the loop piece on the right-hand side so that the wearer can pull the loop section with their right hand while holding the left side in place. Hooking the loops over the knobs.
 
Busks can be found in many lengths from 4" to 18" so you can likely find one for any project you have.
 
The link below will take you an article about getting into and out of a corset with an opening busk.
 
 
The next link will take you to a wide selection of articles related to costume making
 
 
and the last link will take you to a web page to see all the busks that Farthingales offers for sale


Thursday, July 25, 2013

Making a Mesh Corset

There's been a lot of chat lately about "mesh corsets", likely because it's been so hot just about everywhere. Farthingales sells several types of net and mesh so I thought I try my hand at making a mesh corset. I started by choosing a mesh and decided on the one that has the smallest holes - why? because a corset is tight and who wants to have flesh  squeezed through hundreds of little holes! It would make for a very uncomfortable and likely itchy corset experience.

So I chose item #24-5550-90a very fine nylon mesh (it is not elastic or stretchy). I decided to not use any coutil so the front and back panels are two layers of the mesh, this meant the corset busk would be visible if I used a white one, so I opted for a 10 " black busk #15-85BL-10. To encase the bones I chose black bone casing tape 74-3412-90 and black eyelets for the back. I bound the top and bottom edges with black bias binding...next time I'll use Petersham as the mesh looks really nice and the bias just isn't quite as nice a finish.


This is the result so far:

The corset front panels w the busk sew in. Despite the fabric being mesh the main part of the busk is not visible because it to is black. Only the knobs and loops are visible as they are exposed and they're a black metallic.


This is the left side of the corset as it rests on a white surface, you can see how fine the mesh is, there is no way any flesh can get squeezed through this. It surprisingly strong! I did set eyelets down the center back and they seem quite secure (they are set in 4 layers of mesh when the seam allowance is included).

 The corset on a mannequin - unfortunately all of my "squishy: mannequins are covered in black so the corset would not show on them. This mannequin is a hard body one and while the corset does fit fairly accurately is does not allow for the waist cinching effect, but you can see what the corset looks like.

I expect to get someone in next week to try it on so I can get pictures of it in on a human

All supplies for this mesh corset project are available from

www.farthingalescorsetmakingsupplies.com

direct link to the Mesh page


Wednesday, July 24, 2013

New Coutil

Coutil is the ultimate fabric for making corsets; it's not inclined to stretch, it's durable and it's attractive! Theatre's don't just use it for corsets - they use it as the under-structure for gown bodices of many time periods because it holds the shape well and encases bones safely. Ballet  and Opera companies also use it as durability is important.

While coutil is extremely functional don't assume it can't be pretty!  The images below are two new coutil patterns that are now stocked at Farthingales. The just arrived today and they are worth looking at.

The newest addition to the Rose patterned brocade coutil is black with a champagne coloured rose. Farthingales has this same rose patterned brocade coutil in other colours; white on white, beige on beige, black on black, red on black (really stunning) and pale pink. A cotton rayon blend means the rose pattern on this coutil has a subtle sheen against the matte background.
 
 
The "dot coutil" or "spot coutil" is the most popular among theatres because while it is a little pricey it's incredibly durable and easy to work with. The newest addition to this coutil pattern is black with a pale silvery grey dot. This fabric offers awesome support all on it's own. Other colour options for this "dot coutil" are: white on white, black on black, pink on cream and red on black.


The Rose Brocade Coutil and Spot Coutil are not the only coutil fabrics available. Farthingales Corset Making Supplies had over 25 colour/pattern options to choose from so you can co-ordinate your coutil with a fashion fabric or use it alone and still get a very fashionable garment.


To see the whole selection of coutil patterns and colours visit:

http://farthingalescorsetmakingsupplies.com/products.php?cat=coutil


Tuesday, July 23, 2013

New Corset Lacing

Farthingales has just received a new corset lacing cord that's made in Canada which means we can offer it at a great price.

The new corset lace is a flat braid corset lace made of 100% NYLON so it's got a really nice sheen! It measures about 3/16" wide (5mm) and is sold by the meter (which is 3" longer than a yard) or by the spool (183 meters/200 yards).

This is a really pretty and strong corset lacing cord. Nylon is a material that can be dyed but we have not tested this yet.  65 cents a meter or $91.00 a spool!


See details at www.farthingalescorsetmakingsupplies.com

look under "lacing"
 
To finish the tips...just melt them using the flame from a candle or lighter.


Tuesday, July 16, 2013

Black coutil Underbust Corset


The black under-bust corset that I worked on last week is now finished!

It's pretty tiny as it's size 20 and it does not fit any of my dress forms so the shape is not illustrated well here. It's a very curvy piece of work.
 
The busk may look silver but it's actually black metallic. Red stitching and heat seat crystals embellish one set of bone casings.
 
 
The image below shows one side ( the left) of the corset. You can easily see the curve built in to accommodate hips. The back has minimal embellishment since I felt I'd overdone it a bit with the crystals on the front.

 
The side seams have exterior bone casings covered with the same Petersham ribbon that was used to bind the top and bottom edges. I love working with contrasting thread to make design details like that below.

This is corset is ultra strong being made of 2 layers of coutil. The black spot coutil is on the outside and red spot coutil is on the inside...yes, it looks like it could be worn inside out but it might be a challenge to get the busk done up!
 
 
The coutil, busk, bones and Petersham
 
To see more of our projects  visit our Facebook page
and look a the photo album

Tuesday, July 9, 2013

Coutil Long Line Waist Cincher is my Current Project

.A "Long Line" waist cincher is a corset that comes low over the hip but leaves the bust exposed...unless of course you wear a bra, pasties or something else.  It's a great style to keep a smooth line over the hip area and offers more belly support!

This corset is made from two layers of spot coutil / dot coutil. The outer layer is black coutil with black spots and the inside layer is black coutil with red dots. Two layers of coutil makes for an incredibly durable corset - not matter what it's used for. I used a regular busk but it's a black busk not a standard silver busk. Some of the bone casings are mid-panel and decorative and others are on the seams - some inside and some outside.


This is just one half of the corset and it's still not quite finished
 

The spot coutil has been embellished on either side of the busk

And some bone casings have also been embellished
 
 
The bones will be a mix of spiral steel bones and white steels. There will be grommets with lacing up the back, and the top and bottom edge will likely be bound with black satin bias tape...have not decided this yet.


All the product I used came from:


http://www.farthingalescorsetmakingsupplies.com

Thursday, July 4, 2013

Hoop skirts are easier to make with hoop connectors!


So what  is a "hoop connector"? 


 It's a small rust resistant clip that slides onto the ends of a length of hoop steel to connect the two ends and create a hoop.
The ends of the "hoop connectors" are rounded so it makes sliding the hoop steel into the casing easier because there are no corners to catch on the casing.

Slide one end of the hoop steel length into a "hoop connector" then slide the "hoop connector" into the casing. When the "hoop connector" comes out the other end of the casing, slide it onto the back end of the length of hoop steel...creating....a hoop! 

Making hoops couldn't be easier to make, or easier to take apart for compact storage - and for travel (my Civil War hoop petticoat fits in the outside pocket of my suit case - easy access at the airport if needed). Great for hoop skirts and Mascots....think the big bellied ones.
Want to know more? Click here "Hoop Connectors" .
 
"Hoop Connectors" come in two sizes and are custom made to fit Farthingales hoop steel which is 10mm (approximately 3/8") and 14mm (approximately ..but not quite 5/8").  Farthingales "hoop steel" is "spring steel" so it keeps it's shape and yes - you can walk through narrow doorways or sit down without any problems.  The hoop steel is coated with a white finish so there is no worries about oxidation/rust.
 
http://www.farthingalescorsetmakingsupplies.com   offers more than just corset making supplies!

Tuesday, July 2, 2013

Corset Gores

What is a Corset Gore?

Gores are usually triangular in shape (though not always) and they are used to add fullness to a garment. They're most commonly used in skirts to allow the skirt to be very fitted over the hips and then get very full.

Corset gores can be added to increase fullness at the bust and or at the hips. Allowing for greater bust fullness and hip fullness; using "gores" is a an advantage when making corsets for voluptuous women who may have a full bust and hips but relatively small waist.

In the photo above the "bust gores" are solid red satin; cut in a contrast fabric they become a design elements as well as being functional.  The "bust gores" in the corset  below indicate clearly how the gores add fullness to the bust of a corset to accommodate a fuller chest.  These "bust gores" have been stitched with decorative stitching that makes them pretty and adds structural support. 


Gores used in the hip area can also be decorated.  The image below is a "hip gore" that has  decorative stitching along the bottom. All of the gores on this page are "in-seam" gores; these and other types of corset gores will be outlined in the next book - due to arrive in stores in the fall of 2012
 
 
For more corset making tips visit
 
Farthingales Corset Making Supplies web site and click the "Tips n Tricks" link
 
Follow Farthingales Corset Making Supplies on Facebook
 
or subscribe to this blog for updates!


Thursday, June 27, 2013

Two New Coutil Patterns at Farthingales


Farthingales Corset Making Supply will soon be adding to their already extensive selection of coutil.
Currently they stock around 25 different coutil fabrics that range from the most basic herring bone weaves to satin, tiny dots and various brocade patterns. The two new coutil fabrics are due to arrive by early August and while they are not new patterns they are new colour combinations.
 
The "Spot Coutil" is an incredibly durable coutil, very dense and very easy to work with; it's a favorite of several theatres.  The new colour is black with tiny charcoal dots; the black is a matte satin weave and the dots are a shiny satin.
 
 
The "Rose Brocade Coutil" has been very popular in all the colour variations that Farthingales offers and the new one is matte black with shiny "champagne" coloured roses! Evening wear designers have been buying it to use as a foundation for strapless bodices.
 
Both of these coutil fabrics are cotton viscose blends.
 

More coutil fabric can be found on the Farthingales web site

http://www.farthingalescorsetmakingsupplies.com/coutil.php

Check out the whole selection!
 

Monday, June 24, 2013

Tips on how to make a Hoop Skirt

This hoop skirt and corset were made using Farthingales corset making supplies and their "hoop steel" and custom "hoop connectors".

The hoop skirt has several full circle hoops  and 3 open hoops. The hoops are made of hoop steel; hoop steel is a actually "spring steel" and is called so because it want to "spring" back to it's original shape and this is important. Using "spring steel" for hoops means you can sit with relative ease and pass through narrow doorways without risk of bending or denting your hoop skirt. The "spring steel" hoops collapse and then spring back into shape when you stand or get through the doorway.

A hoop skirt can feel surprisingly light when worn.

To create full circle hoops it's best to use "hoop connectors" that will join the two cut ends of the hoop steel. Slide the "hoop connector" onto one cut end of the steel; then feed the "hoop steel" through the casing; leading with the "hoop connector" which has smooth rounded ends that won't catch on the casing. When the steel is through the casing slide the back end of the "hoop steel" into the open end of the "hoop connector"...that's it!  "Hoop connectors" are great if you have to travel or store your hoop skirt because the hoops can come apart, get coiled up tight and the "hoop connector" can keep the coil small. This hoop skirt fit in the outside pocket of my suit case where it could easily be checked out by airport security if needed.

The open hoops need to have the ends of the cut spring steel blunted as they'll be very sharp. There are two options for this; you can apply "bone tips" - also known as "U" tips. This requires two pairs of needle nose pliers or you can use "plastic ends", which can be sewn through so you can secure them in place.

You can find all of these supplies on the Farthingales Hoop Steel Page
http://farthingalescorsetmakingsupplies.com/products.php?cat=hoopsteel

For more costume building tips visit  http://farthingalescorsetmakingsupplies.com/tips-index.php

Be sure to click the Facebook "LIKE" button on the page


Wednesday, June 19, 2013

New Book on Corset Making

The manuscript for my next book "The Art of Corset Building" went to the publisher a few months ago and has been accepted!  However it needs to be pared down from over 500 pages to close to 400 so I've still got some work to do.

The publisher is fine with me publishing the "out cuts" to this blog or to the website www.farthingalescorsetmakingsupplies.com . So check in occasionally to see what mkaes it here.

The first book was titled "The Basics of Corset Building" and very little of what was covered in it will be in book two. It's available on the above web site as well as at www.voguefabricsstore.com and at both Chapters (in Canada) and Barnes and Noble (USA) as well as several other on-line sources.

The new book will not arrive in stores until Fall of 2014.

Tuesday, June 4, 2013

Grommet dies for a Grommet Hand Press Machine

Grommet Setting Machine


A "hand press machine" makes setting grommets a lot easier, a lot faster and a lot healthier. A  "hand press machine" is actually a tool, unless it is motorized; but they are typically called machines anyway.  If you don't have a "hand press machine", then chances are you are using plier style hole punches mallet to  set grommets.  The pliers are hard on your hands and hammer setting grommets can be both time-consuming and inaccurate.
 
  There are several styles of "hand press machines"; some have handles that pull towards you, some have handles that pivot, and some have handles that get pushed down.   The one used in this article has a handle that gets pushed down.  Farthingales sells this one and one that pivot's.

Regardless of which type of "hand press machine" you choose to use the machine must be securely anchored to a stable surface.  .  The photograph shows a large C clamp securing the "hand press machine" to a tabletop.  .  You can also use bolts to permanently secure a "hand press machine".
 
Various dies can be purchased to fit the machine and serve different purposes.   Pictured below  are; "adaptors" in to sizes and a hole punch and anvil set. The "adaptors" consist of a post and a threaded hole .   The post fits into the machine, and dies gets screwed into the threaded hole. 


To set eyelets or grommets you have to use the dies that are specific to the grommets or the eyelets . They look very similar but setting a grommet with an eyelet die will not work as well as setting a grommet with the grommet die.


There is another type die available for setting grommets.  It's called pick die and has a spike that pokes through the fabric; creating the hole and setting the grommet simultaneously.   It sounds like a great idea and saves the time of hole punching but my experience is that it pulls the fabrics and creates marks aroundthe grommets.   So I don't recommend this die but there is a picture of it below.
 

 For more information on how to set grommets with a hand press machine / grommet setting machine / eyelet setting machine or to purchase one go to www.farthingalescorsetmaksupplies.com